How to Check Welding Defects
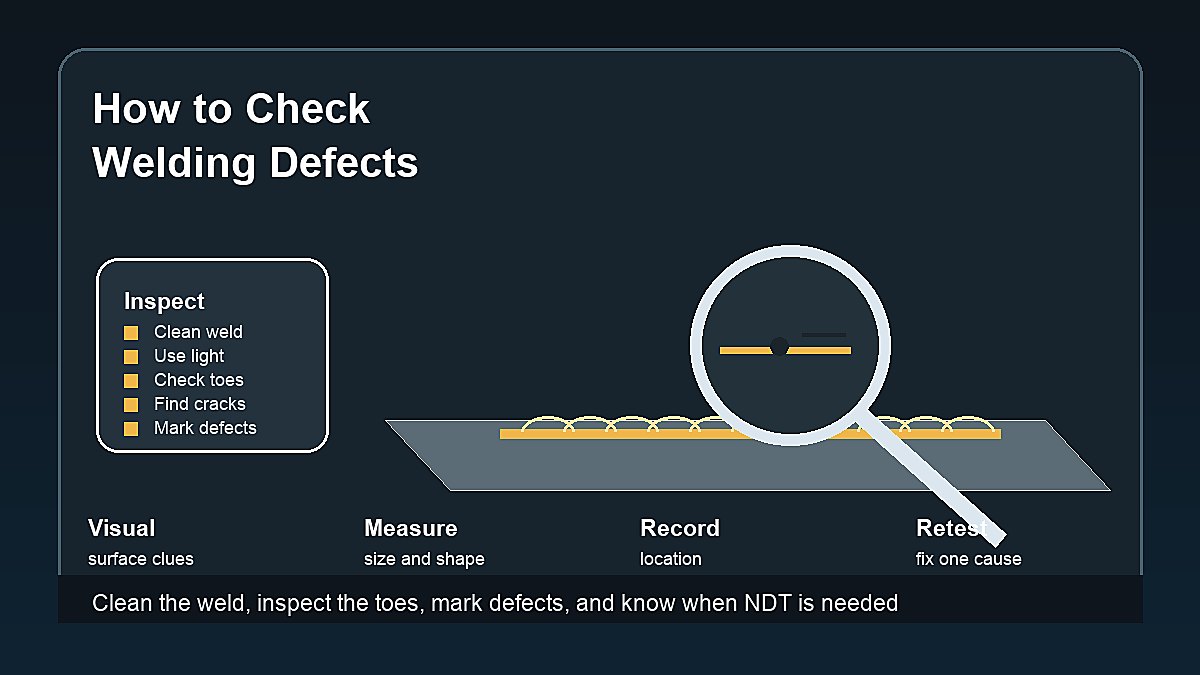
If you want to learn how to check welding defects, start with a clean weld, good lighting, and a slow look at the whole bead. Most beginner checks begin with visual inspection: look for cracks, holes, undercut, overlap, slag, poor bead shape, lack of tie-in, and signs of contamination.
Visual inspection will not find every hidden problem, but it is the first habit beginners should build. A weld that fails a basic visual check should not be ignored, polished, or painted over before you understand what went wrong.
Mark Dawson beginner note: check the weld before grinding it smooth. Grinding can remove clues such as pinholes, cracks, toe grooves, slag lines, and crater defects.
Quick Answer
To check welding defects, let the weld cool safely, clean slag and spatter, inspect with good light, look at the weld face, toes, start, stop, and crater, then identify visible defects such as porosity, undercut, cracks, slag inclusion, overlap, burn-through, and poor fusion signs. Mark the defect location, take photos, compare with your settings, and use professional inspection or NDT when the weld is safety-critical.
| Inspection Step | What to Check | Why It Matters |
|---|---|---|
| Clean | Remove slag, soot, spatter | Defects hide under debris |
| Light | Use bright angled light | Reveals grooves and cracks |
| Edges | Check both weld toes | Finds undercut and overlap |
| Surface | Look for holes or cracks | Shows porosity and cracking |
| Record | Mark and photograph | Makes troubleshooting easier |
What You Can and Cannot Check Visually
Visual inspection can catch many surface defects: porosity, cracks that reach the surface, undercut, overlap, excessive spatter, burn-through, poor bead shape, crater problems, missing fill, and obvious lack of tie-in at the edges.
Visual inspection cannot prove the weld is sound inside. Internal porosity, lack of fusion, slag trapped below the surface, and hidden cracks may need destructive testing or nondestructive testing. That is why critical welds require qualified procedures and inspection, not only a beginner visual check.
For a defect overview, read Common Welding Defects. This guide focuses on the inspection process.
Step 1: Let the Weld Cool Safely
Do not grab or inspect hot metal with bare hands. Let the weld cool enough to handle safely, or use pliers and gloves when moving practice coupons. Hot metal can look dark and harmless while still causing burns.
Avoid quenching practice welds just to inspect faster unless the procedure allows it. Rapid cooling can change the metal and may create misleading results, especially on materials sensitive to cracking.
Keep the work area safe while the part cools. Sparks, slag, and hot cutoffs can start fires after the arc stops.
Step 2: Clean the Weld Before Judging It
Clean the weld enough to see the bead clearly. For stick and flux core welds, remove slag with a chipping hammer and wire brush. For MIG and TIG, brush away soot, spatter, and surface discoloration as needed.
Do not grind everything flat before inspection. A light cleaning is different from erasing the evidence. If you grind before looking, you may remove a crack, undercut line, or porosity pattern that would have helped diagnose the problem.
On multi-pass welds, inspect between passes. Slag inclusion and poor fusion can start when one pass is covered before it is cleaned properly.
Step 3: Use Good Lighting and Angle
Lighting changes what you can see. Use bright light from the side, not only straight overhead. Angled light helps reveal grooves, overlap lips, cracks, crater pits, and uneven bead edges.
Rotate the part if possible. Look along the bead from different angles. A defect that is invisible from one view may stand out when light catches the weld toe or crater.
A magnifier can help for small practice welds, but do not let magnification replace basic inspection habits. First clean, light, and view the whole weld.
Step 4: Check the Weld Toes
The weld toes are the edges where the weld bead meets the base metal. Many beginner problems show up there first. Look for grooves, rolled-over metal, lack of blending, and sharp lines.
Undercut appears as a groove beside the bead. Overlap appears when weld metal rolls over the base without fusing properly. Both can be missed if you only stare at the center of the bead.
A toe groove is a sign to slow down and diagnose the edge of the bead. Read What Is an Undercut in Welding? before repeating the same settings.
Step 5: Check the Weld Face
The weld face is the visible top of the bead. Look for pinholes, excessive spatter, rough texture, uneven width, low spots, high rope-like shape, cracks, crater holes, and sudden changes in bead pattern.
Pinholes may point to porosity. A rope-like bead can suggest low heat or fast travel. A very wide flat bead may suggest too much heat or slow travel. A crater crack at the end can point to poor stopping technique.
Bead appearance is not proof of strength, but it gives clues. Compare the face with the machine settings, travel speed, and joint fit-up.
Step 6: Check the Start, Stop, and Crater
Beginners often inspect the middle of the bead and ignore the start and stop. Those areas matter. Starts can be cold or poorly fused. Stops can leave crater cracks, pits, or low spots if the puddle is not filled before breaking the arc.
Look for a sudden lump, hole, crack, or sharp crater at the end. In practice, mark that section and repeat the bead with better start and stop control. On real welds, crater problems may need proper repair.
Step 7: Mark, Measure, and Photograph Defects
Use a marker or soapstone to circle the defect before grinding or rewelding. Take a photo while the defect is still visible. For practice work, note where it appears: start, middle, end, left toe, right toe, root, cap, or crater.
Simple measurements can help. Record the approximate length of a crack, the section of undercut, or the area of porosity. You do not need a full inspection report for scrap practice, but you do need enough detail to learn from the mistake.
Good notes make troubleshooting easier. Write down process, material thickness, settings, consumables, gas, position, and what you changed next.
Step 8: Use Simple Measuring Tools
A beginner does not need a full inspection kit for every practice bead, but simple tools help. A ruler, caliper, flashlight, straightedge, and basic weld gauge can show bead width, reinforcement height, leg size, underfill, and obvious shape problems.
Measurements matter because the eye can be fooled. A bead may look large but still have poor toe blend. Another bead may look small but be more consistent. Measuring practice welds helps you separate appearance from repeatability.
Do not invent acceptance limits for critical work. Codes, drawings, job procedures, and inspectors define what is acceptable. For home practice, measuring is mainly a learning tool.
Step 9: Check the Back Side When Possible
On some practice joints, the back side gives useful clues. Burn-through, lack of penetration, heavy sugaring, oxidation, or uneven root shape may be visible from the opposite side. This is especially helpful on butt joints and thin material practice.
Do not assume the front face tells the whole story. A smooth cap can hide a poor root, trapped slag, or weak fit-up. When the joint allows it, inspect both sides before deciding what to change.
Simple Beginner Defect Checklist
- Are there visible cracks anywhere in the bead or crater?
- Are there pinholes or gas pockets on the surface?
- Is there undercut along either weld toe?
- Does the bead overlap the base metal without tying in?
- Is slag trapped at the edge or between passes?
- Does the bead suddenly change width or height?
- Is there burn-through, missing fill, or a hole?
- Does the start or stop look weak, cracked, or underfilled?
What to Record in a Practice Log
A short practice log makes defect checking more useful. Write down the process, material thickness, joint type, position, machine settings, electrode or wire, shielding gas, filler rod, and what the finished weld looked like.
Add one photo before cleaning and one photo after cleaning if possible. The first photo captures slag, soot, and spatter behavior. The second photo shows the bead shape and visible defects more clearly.
Keep the notes simple. The goal is to avoid repeating the same mistake. If three beads in a row have porosity, your notes may show that wind, dirty metal, gas flow, or filler contamination stayed the same each time.
When Visual Inspection Is Not Enough
Visual inspection is only the first level. If the weld is structural, pressure-related, vehicle-related, trailer-related, lifting-related, or part of workplace production, it may need qualified inspection or testing.
Common inspection methods include visual testing, dye penetrant testing, magnetic particle testing, ultrasonic testing, radiographic testing, bend testing, and macro etch testing. The right method depends on the material, weld type, defect concern, and code or procedure.
Do not assume a weld is strong because it looks clean. Lack of fusion and internal slag can hide below the surface.
How to Use Inspection to Improve Practice
After each practice bead, inspect before changing settings. Choose one defect and connect it to one likely cause. Porosity, for example, should push you to check cleaning, gas coverage, wind, and consumables before changing every setting.
For undercut, compare heat, travel speed, angle, and edge fill. Slag inclusion points toward cleanup and bead placement. Heavy spatter points toward stickout, arc length, voltage, wire feed, or amperage depending on process.
For process practice, connect your inspection notes to the right guide: MIG Welding Techniques for Beginners, Stick Welding Basics for Beginners, or Basic TIG Welding Techniques for Beginners.
Defect Clues by Welding Process
MIG weld inspection often starts with bead shape, spatter, undercut, porosity, and tie-in at the toes. A cold-looking bead may sit high and narrow. A too-hot bead may flatten out, undercut the edges, or burn through thin metal. Gas-related problems may show up as porosity or sooty, dirty welds.
Stick weld inspection needs slag removal before judgment. Look for trapped slag at bead edges, rough restarts, undercut, worm tracks, porosity, and uneven bead placement. A weld can look very different before and after chipping, so inspect after proper cleaning.
TIG weld inspection focuses on cleanliness, bead consistency, crater condition, discoloration, undercut, and filler timing clues. Black specks, grey stainless welds, or dirty aluminum beads can point toward contamination, gas coverage, overheated metal, or poor cleaning.
When to Cut, Break, or Bend Practice Welds
For non-critical practice coupons, visual inspection is only part of learning. Cutting, breaking, or bending practice welds can reveal whether the bead actually fused or only looked acceptable from the surface.
A simple macro-style practice check can involve cutting across the weld, polishing the cross-section enough to see the shape, and looking for lack of fusion, trapped slag, or poor penetration. This is not a certified test, but it teaches beginners what the inside of a bead can look like.
Only do destructive checks on scrap practice pieces. Do not cut, bend, or hammer real parts unless the work plan allows it and the part is safe to test that way.
Common Mistakes When Checking Defects
- Inspecting before the weld is cool enough to handle safely.
- Leaving slag on the weld and missing defects underneath.
- Grinding the bead smooth before looking closely.
- Checking only the center of the bead and ignoring the toes.
- Calling a weld good because it is shiny.
- Changing many settings at once after finding one defect.
- Using visual inspection as a substitute for professional testing on critical welds.
Safety Notes
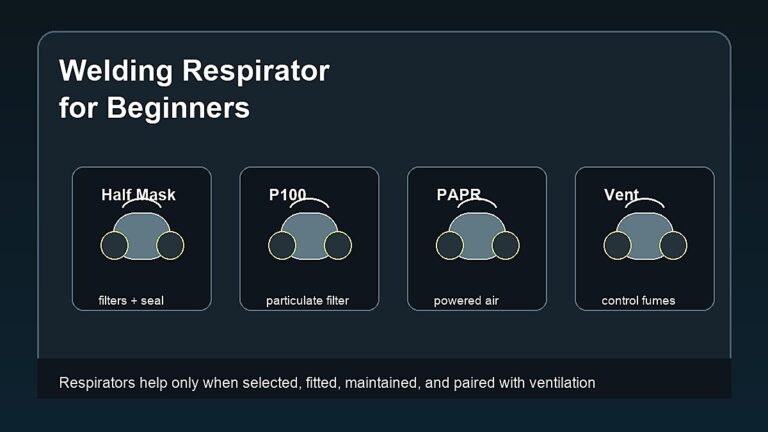
Checking welding defects can involve hot metal, sharp slag, wire brushing, grinding dust, sparks, fumes, UV exposure from nearby welding, and fire risk. Wear safety glasses, gloves, hearing protection when grinding, and proper respiratory protection when dust or fumes are present.
Do not inspect or repair critical welds by guesswork. Review OSHA welding hazards guidance, OSHA welding, cutting, and brazing requirements, and AWS safety resources.
FAQ
What is the easiest way to check welding defects?
The easiest first step is visual inspection. Clean the weld, use good lighting, check the weld face, both toes, start, stop, and crater, then mark any visible defects.
Can you see all welding defects from the outside?
No. Some defects are internal, including hidden porosity, slag inclusion, lack of fusion, and cracks. Critical welds may need nondestructive testing or destructive testing.
What defects should beginners look for first?
Beginners should look for porosity, undercut, cracks, overlap, slag inclusion, excessive spatter, burn-through, uneven bead shape, and crater defects.
Should I grind a weld before inspecting it?
Do light cleaning first, but do not grind the weld smooth before inspection. Grinding can remove clues that help identify the defect and its cause.
When do I need professional weld inspection?
Use professional inspection for structural, vehicle, trailer, pressure, lifting, workplace, or safety-critical welds. Beginner visual checks are not enough for those jobs.
Final Advice
Good defect checking is slow and deliberate. Clean the weld, inspect the face and toes, mark what you find, connect the defect to a likely cause, and test the fix on scrap. That habit turns every practice bead into useful feedback.