How to TIG Weld Stainless Steel for Beginners
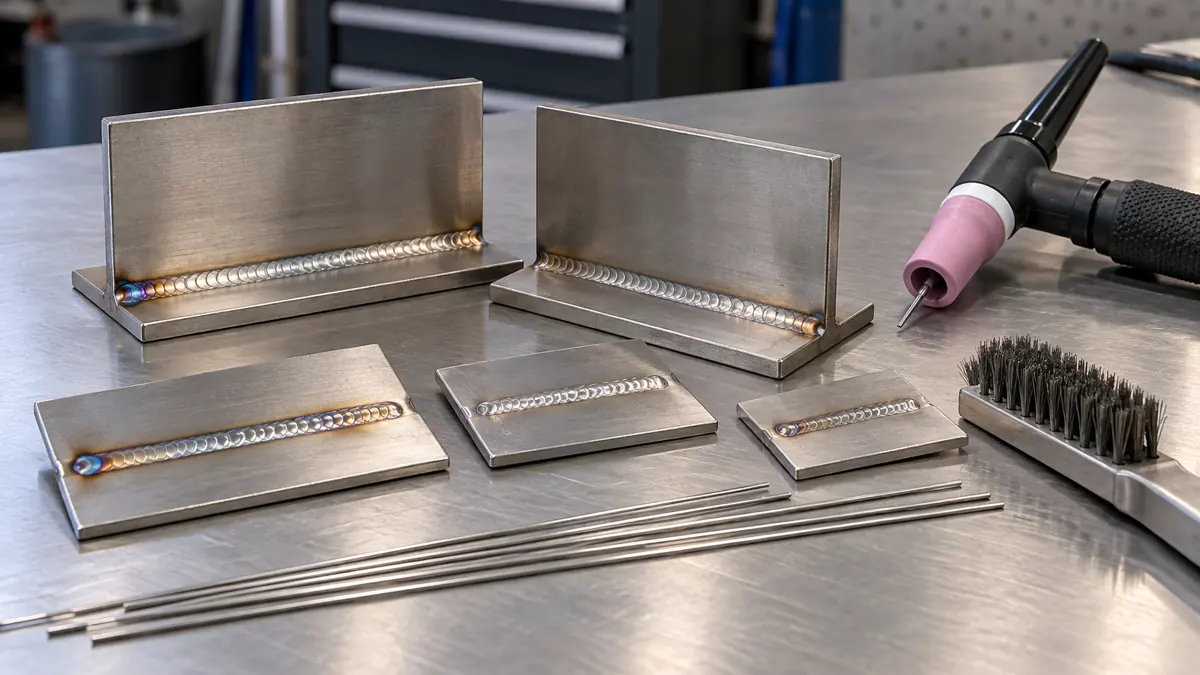
Start TIG welding stainless steel with identified material, compatible filler, clean dedicated tools and a setup checked against your machine instructions. Practise a short joint you can inspect on both sides. Keep the arc controlled, add filler without disturbing the torch, and manage heat and shielding throughout the weld and its cooling period.
This guide describes a beginner practice sequence for known austenitic stainless, such as documented 304L coupons. It does not supply a procedure for every stainless family or qualify a learner for pressure, structural or hygienic fabrication. If you are still choosing a process, start with our broader stainless-steel welding guide.
Define the practice joint before choosing settings
Use matching coupons of known grade and thickness rather than a mystery sink, exhaust part or leftover tube. Write down the joint type and how its root will be protected and inspected. Have an instructor help select a manageable exercise if you have not yet controlled a TIG puddle on steel.
A small flat practice assembly makes it easier to see what each hand is doing. Save tight corners and pipe roots for later exercises. The first objective is to repeat preparation, movement and stopping consistently, not to produce a decorative ripple pattern.
For unfamiliar equipment, review our TIG process introduction before working through the sequence below.
Match the equipment and consumables to the material
Conventional TIG on common austenitic stainless generally uses DC electrode negative. Verify the machine’s mode and connections, suitable tungsten type and diameter, torch components and control arrangement against the relevant instructions. The Miller TIG basics guide explains equipment setup and control fundamentals.
Choose filler from the identified base material and service requirements. ER308L is a common selection for 304L applications, but that example is not permission to use it on every stainless grade or dissimilar joint. Lincoln Electric’s consumable information identifies 304L applications for its ER308L-classified filler. Check the exact product’s data and the applicable procedure before selecting rod diameter or chemistry.
For a conventional beginner stainless TIG setup, pure argon is a common shielding choice. Confirm the specified gas rather than connecting a cylinder because it was suitable for another process. A MIG mixture containing active gases is not an interchangeable TIG supply.
| Before striking an arc | What to establish |
|---|---|
| Material | Grade, thickness and matching coupon identity |
| Filler and tungsten | Compatible classifications, sizes and condition |
| Machine | Process, polarity, current control and starting method |
| Shielding | Torch coverage, postflow and any required root protection |
| Assessment | What the instructor or procedure requires you to examine |
This checklist deliberately leaves out a universal amperage or gas-flow figure. Joint geometry, thickness, tungsten, cup and equipment matter. Begin with the relevant manufacturer’s guidance and a supervised trial on matching material.
Prepare stainless without transferring contamination
Use cleaning tools reserved for stainless work, including appropriate brushes and abrasives. Remove oils and contaminants with a suitable method before heating; follow cleaner instructions and allow the prepared surface to dry. Keep filler clean and identifiable instead of leaving it among mixed rods on the bench.
Fit the joint before welding. Uneven gaps create another variable and can force you to spend longer adding filler in one area. Clamp and support the coupons so the planned weld remains accessible, then rehearse the full movement with the equipment made safe.
For that rehearsal, ask two practical questions: can you see both joint edges, and can you move the torch without a cable tugging your hand? Correct those problems before chasing a different machine setting. Miller’s stainless fabrication guidance emphasizes dedicated preparation tools, fit-up, compatible filler and heat management.
Plan shielding on the face and the root
The torch shields the area beneath its cup. It does not automatically protect the opposite side of a joint that becomes hot enough to oxidize. Decide how root protection will be provided before a full-penetration exercise or a tube joint.
A controlled back purge supplies protective gas to the root side. Its arrangement, outlet, flow and verification must suit the assembly and procedure. Obtain instruction for purge equipment rather than sealing up a tube and adding gas without a plan. Lowering current is not a substitute for required root shielding.
At the torch, check the gas supply, fittings, cup and local drafts. More flow is not automatically better: excessive flow can disturb coverage. Keep necessary fume control operating while arranging it so it does not strip away the shielding. Miller’s shielding-gas guidance explains these coverage factors. Our TIG gas guide provides related process context.
Make a short, controlled practice weld
- Check the setup and position. Confirm protection, controls, the work connection and the gas arrangement. Support your hands without contacting hot material or creating an electrical hazard.
- Start using the machine’s prescribed method. Establish a controlled puddle at the intended start. Do not rush filler into a joint you cannot clearly see.
- Advance with a steady arc. Keep the torch position consistent while watching how the puddle meets the joint edges. Avoid stretching the arc to improve your view; improve positioning instead.
- Add filler into the puddle. Use the technique demonstrated for your exercise. Keep the hot filler end protected and avoid touching it to the tungsten. If the tungsten becomes contaminated, stop and correct it safely.
- Finish deliberately. Use appropriate current reduction and filler control to complete the end, then maintain the prescribed gas protection while the weld and tungsten cool.
Those steps are a practice framework, not a complete welding procedure. Miller’s TIG troubleshooting guide connects arc-length errors, contamination, root fusion problems and abrupt stops with common defects.
Manage heat without losing fusion
Do not reduce current repeatedly simply because you see discoloration. A setting that forces you to linger can make the exercise harder to control. Review current, arc length, travel, fit-up and shielding together, and let the coupons cool appropriately between comparisons.
Pulse can be useful when the equipment and application support it. It alternates between peak and background current, but its benefits depend on the settings and technique. It does not remove the need to establish fusion or follow interpass limits. Miller’s pulsed-TIG discussion explains its heat-control role. For first comparisons, keep optional controls consistent so you can identify what changed.
Inspect both sides and separate color from acceptance
After safe cooling, examine the face, edges, end crater, distortion and accessible root. Rough black oxidation on the root, often called sugaring, is a reason to reassess protection and technique. A bright face cannot establish that the root is acceptable or that internal fusion is sound.
Heat tint also matters beyond appearance. TWI explains that oxide formation and chromium depletion near the surface can impair corrosion resistance. Appropriate post-weld cleaning may be needed for the service; polishing until the color disappears is not automatically a validated restoration method.
Have the sample assessed using methods appropriate to the exercise. For actual work, follow the required procedure, inspection and finishing specifications. Chemical cleaning products can introduce additional hazards and should not be improvised from a home recipe.
Treat stainless fumes as part of the first lesson
Stainless welding can produce hazardous exposures, including hexavalent chromium. OSHA identifies stainless hot work as a source of exposure. Little visible smoke does not establish safe air.
Use appropriate extraction and an exposure assessment for any respiratory-protection needs. Keep your face out of the plume, protect skin and eyes, secure gas cylinders and control fire and electrical hazards. Shielding gas can displace oxygen; a beginner exercise belongs in a suitable workspace, not a confined space.
Turn the first sample into a useful next lesson
WeldingPilot practice note: label each coupon with its material, joint and settings, then record one observation and one next check. “Torch distance increased when I repositioned the filler hand” gives the next session a clear task. “Bad color” needs a closer look at where and when the discoloration appeared.
Repeat the same joint after correcting that one issue. Change material or position only when the current task is sufficiently controlled and assessed. This builds evidence of progress without declaring a polished sample ready for service.
Questions beginners ask
Can I copy mild-steel TIG settings?
Use stainless-specific material and equipment guidance. Some controls may look familiar, but filler selection, heat management and corrosion requirements still need attention.
Do all stainless TIG joints need the same purge?
No. Root exposure, joint design and service requirements determine the protection arrangement. Establish what your exercise or procedure requires rather than copying a pipe-purge setup onto every joint.
Can a rainbow bead prove a good weld?
No. Color alone cannot establish fusion, root condition or corrosion performance. Inspect appropriately and apply the relevant acceptance and finishing requirements.