How to Solder Copper Pipe for Beginners
To solder copper pipe, cut and deburr the tube, clean the mating surfaces, apply a thin layer of compatible flux, assemble the joint, then heat the assembly so solder flows into the fitting. Let it cool naturally before cleaning and checking it. The goal is solder inside the joint, not a large silver lump around its edge.
Start with an accessible practice assembly made from new copper tube and plain copper solder fittings. Learning at a bench lets you see the joint and control the work position. A leaking pipe inside a wall introduces access, isolation and fire problems at the same time you are trying to learn.
Understand what makes the joint seal
“Sweating” copper pipe means soldering it. The tube and fitting remain solid while molten filler metal enters the small space between them by capillary action. That is different from a fusion weld, where the base metal melts.
A sound connection depends on preparation, fit and heat reaching the joint surfaces. Melting solder in a torch flame and dripping it onto the outside does not show that the socket has filled. The Copper Development Association’s Copper Tube Handbook explains why the tube, fitting and capillary space must be heated appropriately, particularly when copper-alloy components are involved.
Gather a small, matched practice kit
For a first exercise, choose one tube size and matching plain copper fittings. Keep valves and mixed-material components for a later lesson, when you can follow their particular heating instructions.
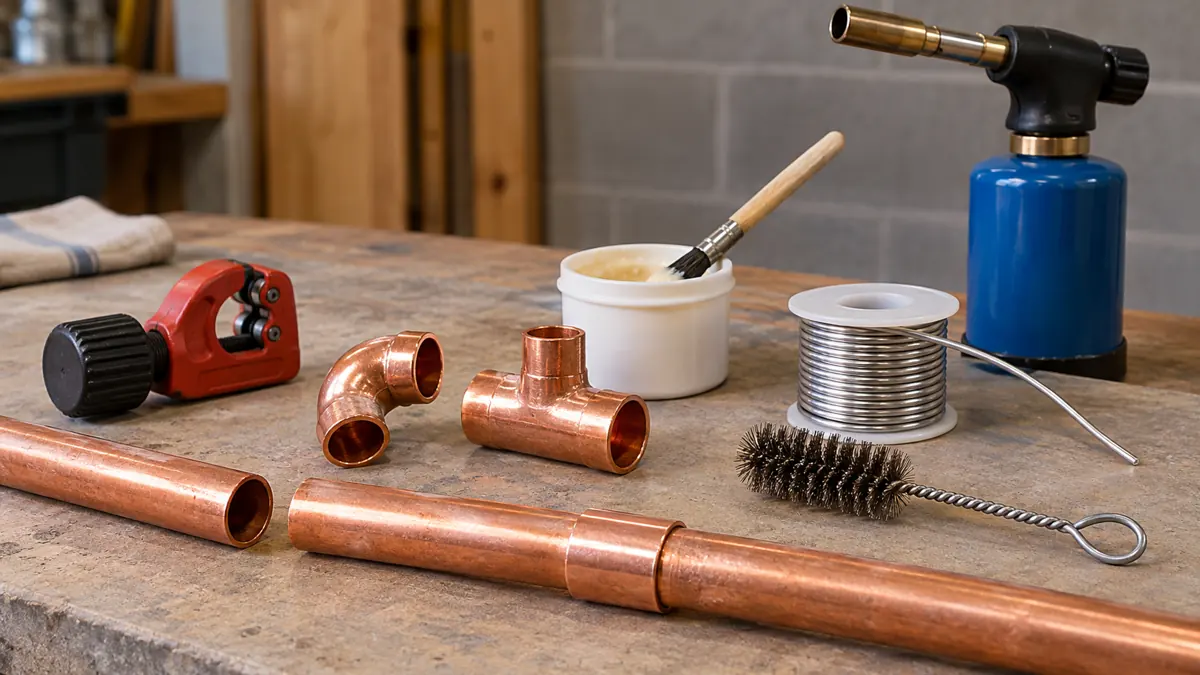
- Copper tube, matching solder-joint fittings and a suitable tube cutter.
- A deburring tool, abrasive cleaning pad or cloth, and a fitting brush.
- Plumbing solder and compatible flux selected for the intended service, plus a flux brush.
- A suitable torch, specified fuel and tip, used according to its instructions.
- A stable heat-resistant work area, appropriate eye and hand protection, and fire protection.
Oatey’s copper soldering guide provides a useful equipment reference. Check the supplies already in your toolbox rather than assuming any silver-colored solder or unlabeled paste is suitable.
For drinking-water service, select solder, flux and components explicitly suitable for potable-water applications. Follow their instructions and applicable local requirements. An electronics solder label is not a plumbing approval. Oatey’s plumbing solder information distinguishes products intended for that work.
Set up before lighting the torch
For practice, keep both tube ends open and the assembly unpressurized. For an existing water line, establish safe isolation, depressurization and drainage before work; if you cannot do that reliably, have a qualified plumber handle it. Do not heat a sealed section or use this exercise as a procedure for fuel-gas or refrigerant systems.
Remove nearby combustibles, arrange suitable ventilation and inspect where the flame and conducted heat could travel. Protect adjacent materials with suitable equipment, keep an appropriate extinguisher accessible and check for smoldering material afterward. A flame shield does not make an unseen wall cavity safe.
Read the torch’s operating instructions, including permitted positions and fuel compatibility. Bernzomatic’s use guidance explains that torch designs differ; some models are intended to operate upright. Choose a work position that suits your actual equipment.
Prepare the tube and fitting
1. Measure, cut and deburr
Allow for the tube entering the fitting socket when measuring. Cut square without crushing the tube. Remove the internal cutting burr and any outside burr that interferes with assembly, using a suitable tool without distorting the end.
The CDA Copper Tube Handbook explains why tube-end preparation and proper seating matter. Before moving on, check that the tube can enter the matching fitting properly; do not use force to hide a damaged end.
2. Clean both mating surfaces
Clean the tube exterior over the socket-engagement area and the fitting interior with appropriate abrasive material or a fitting brush. Remove oxidation and soil without grinding the joint loose. Avoid touching the cleaned areas with oily gloves or bare fingers.
Flux is not a substitute for this step. The CDA Copper Tube Handbook treats cleaning and flux application as separate operations and warns against excessive material removal.
3. Apply flux and assemble
Brush a thin, even coating of the specified flux onto the mating surfaces. Insert the tube fully, align the pieces and provide support so they stay still. Remove exterior excess as instructed by the product manufacturer.
Water-soluble and tinning flux describe different product properties. Tinning flux contains solder powder; a product’s exact formulation determines its use and cleanup requirements. Oatey’s flux-selection guide explains the differences. Read your container instead of treating every paste as interchangeable.
Heat the assembly and feed solder into the joint
Use a controlled heating pattern appropriate to the tube and fitting. CDA’s Copper Tube Handbook describes preheating the tube and moving heat between the tube and fitting cup. The purpose is to bring the joint surfaces to soldering temperature, not to concentrate the flame on one small spot.
Test readiness by touching solder to the joint away from the direct flame. If it does not melt from the assembly’s heat, withdraw it and continue the appropriate heating sequence. Once it flows, feed it into the socket entrance while maintaining suitable heat distribution. Follow the fitting and solder instructions for application.
Do not choose a universal number of seconds from a video. Tube size, component mass, torch and surroundings change the heating demand. Likewise, an oversized external bead is not a useful target for solder quantity. Watch whether filler enters the joint rather than simply adding more.
If flux burns or solder will not wet the surfaces, stop and reassess. More flame and more solder may compound the original preparation problem. Let the assembly become safe to handle before deciding whether it needs disassembly, cleaning or replacement.
Cool, clean and check the result
Leave the assembly supported and undisturbed while the solder solidifies. Allow natural cooling; do not quench it to speed the exercise. CDA’s soldering guidance specifies natural cooling followed by removal of flux residue.
When sufficiently cool, clean the exterior using the flux manufacturer’s method. For an installed system, carry out the required internal flushing and commissioning procedure too. Oatey’s flux guidance discusses residue removal; exterior cleanup alone does not establish that a system has been flushed.
Inspect the full circumference where accessible, but do not treat a neat ring as proof of internal fill. Before service, use the test method and acceptance requirements appropriate to the complete installation. There is no universal pressure or test duration for every assembly. Do not improvise a compressed-air pressure test for a beginner bench exercise.
If a joint leaks, isolate and depressurize the system before assessment. Smearing solder over a wet, dirty exterior does not address why the original joint failed. A plumber or instructor can help determine the appropriate rework.
Use symptoms to choose the next check
The following observations are prompts for investigation, not a diagnosis from appearance alone:
| Observation | Check before another attempt |
|---|---|
| Solder stays solid at the socket entrance | Whether the joint surfaces have reached the filler manufacturer’s working conditions. |
| Solder melts but sits in blobs | Cleaning, suitable flux, fit and heat distribution; direct flame can melt filler without preparing the joint. |
| Flux burns before useful flow | Torch size, heating pattern and product instructions rather than adding more filler. |
| The joint moves during heating | Support and alignment; improve the arrangement before the next exercise. |
| A cooled joint leaks during an appropriate test | The complete preparation and joining sequence, followed by a proper rework decision. |
A useful first practice session
WeldingPilot practice note: record the preparation as well as the finished result. Write down the tube size, fitting, solder, flux and torch setup. After cooling, note whether the tube stayed seated and where solder flowed. Keep unsuccessful samples identifiable so an instructor can review them.
Repeat a comparable joint with one deliberate improvement. For example, if the first assembly shifted, correct the support before changing flux or fuel. A short, specific observation makes the next attempt more useful than declaring that the whole technique “doesn’t work.”
Questions beginners ask
Is soldering copper pipe the same as welding it?
No. In this soldering process, filler flows between solid tube and fitting surfaces. For the broader process distinction, see our introduction to welding.
Can I solder without flux?
For the conventional copper plumbing solder joint described here, use the compatible flux specified for the job. Do not substitute a different joining process’s instructions or assume clean-looking copper makes flux unnecessary.
Can I practise on a valve first?
A plain copper fitting is a simpler learning exercise. Valves and other components can have different heating needs and vulnerable internal parts; use their specific installation instructions when moving beyond practice fittings.
Does a shiny joint mean it is good?
Appearance alone cannot establish socket fill, correct materials or service readiness. Review how the joint was made and complete the appropriate inspection and testing before putting an installation into use.