How Do Auto-Darkening Welding Helmets Work?
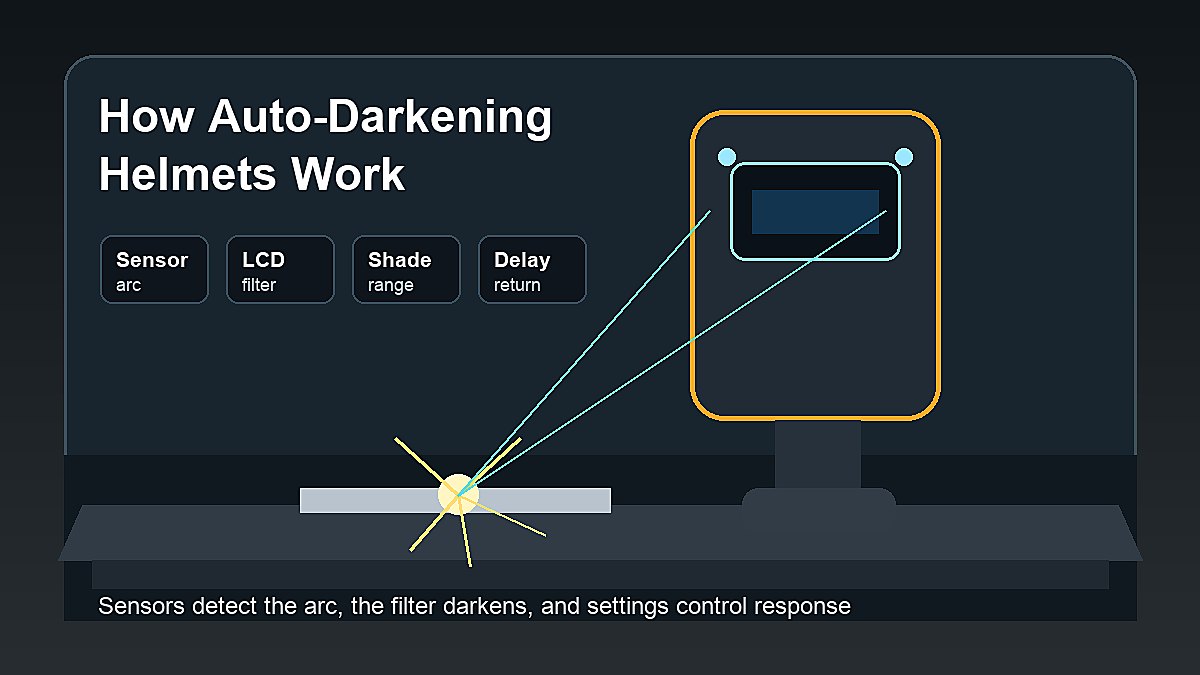
How do auto-darkening welding helmets work? They use arc sensors, an electronic filter lens, shade controls, batteries or solar assist, cover lenses, and a protective helmet shell. Before welding, the lens stays light enough to see the joint. Arc detection tells the filter to darken to the selected welding shade.
Beginners often like auto-darkening helmets because they can keep the helmet down while lining up the torch, electrode, or filler rod. That helps with tack welds, MIG starts, stick starts, and TIG control. The helmet still has to be rated, set correctly, tested, and used with safety glasses and other PPE.
Mark Dawson beginner note: auto-darkening is convenient, but it is not magic. Check shade, mode, sensitivity, delay, battery, sensors, and lens condition before welding. If the lens flickers, darkens late, or does not darken, stop and troubleshoot before striking another arc.
Quick Answer
An auto-darkening welding helmet works by detecting arc light with sensors and switching an electronic filter lens from a lighter state to a darker welding shade. The shell covers the face, the cover lenses protect the filter, and the controls let the welder adjust shade, sensitivity, and delay. It still needs safety glasses underneath.
| Part | What It Does | Beginner Check |
|---|---|---|
| Arc sensors | Detect the welding arc | Keep them clean and unblocked |
| Electronic filter | Changes to the selected shade | Test before welding |
| Shade control | Sets how dark the lens becomes | Match the process and amperage |
| Delay control | Controls return to light state | Adjust for comfort and process |
| Grind mode | Keeps lens light for grinding | Turn off before welding |
The Helmet Shell
The shell is the outer body of the helmet. It helps cover your face, forehead, cheeks, and part of the neck area from sparks, spatter, and radiant exposure. It also holds the lens system at the correct viewing position. A damaged shell should not be ignored because gaps or cracks can expose skin and eyes.
The shell does not make the helmet a complete safety system by itself. You still need safety glasses underneath, flame-resistant clothing, gloves, and a safe work area. For the full PPE list, read Protective Equipment Essentials for Beginner Welders.
The Filter Shade
The filter shade is the part that makes welding viewable. Welding arcs are much brighter than ordinary shop light. The shade reduces the light reaching your eyes, and the correct shade depends on process and amperage. MIG, TIG, stick, flux core, cutting, and grinding are not all the same.
A shade that is too light can be unsafe. A shade that is too dark can make the joint hard to see and lead to poor technique. The safest beginner approach is to follow the helmet manual, machine guidance, and recognized safety references instead of guessing.
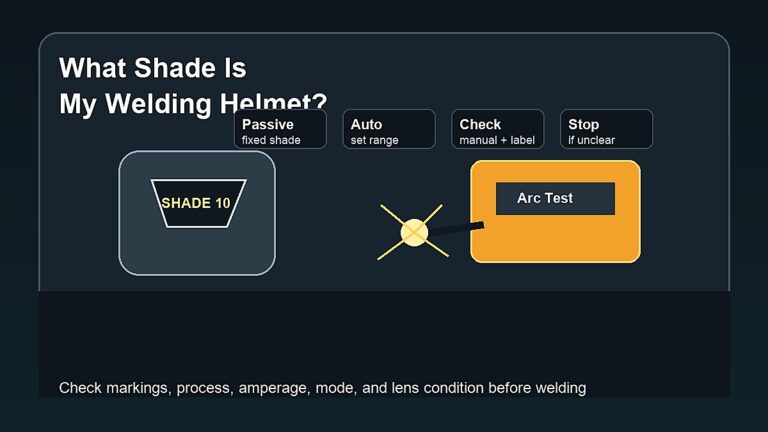
Passive Welding Helmets
A passive welding helmet uses a fixed dark lens. The lens does not change when the arc starts. The welder positions the work, lowers the helmet, and starts welding through the dark shade. Passive helmets are simple and reliable, but beginners may need practice to lower the helmet without losing the start point.
Because the shade is fixed, the lens must match the work. If you switch process or amperage range, check whether the shade is still suitable. A passive helmet is not automatically safe for every welding task just because the lens is dark.
Why the Shade Number Matters
Shade numbers tell you how dark the welding filter is. A higher number is darker. Beginners should not choose shade by comfort alone because comfort can be misleading. The correct shade depends on the arc process, amperage, and manufacturer guidance.
Too light can be unsafe. Too dark can make the weld pool hard to see, which may lead to poor gun angle, wandering beads, or leaning too close to the work. Good helmet use balances protection and visibility.
Auto-Darkening Welding Helmets
An auto-darkening welding helmet uses sensors and an electronic filter. Before welding, the lens is lighter so you can see the joint. Once the arc is detected, the lens darkens to the selected welding shade. This makes starts, tacks, and fit-up easier for many beginners.
Auto-darkening helmets still need checks. The battery, sensors, sensitivity, delay, shade, and mode must all be right. A helmet left in grind mode or blocked by a fixture may not behave as expected. See Are Auto-Darkening Welding Helmets Safe? for the safety details.
Arc Sensors: How the Helmet Knows You Started Welding
The sensors are the helmet’s arc-detection system. They look for the bright arc signal and tell the filter to darken. Most beginner helmets have multiple sensors near the front lens. More important than the count is whether those sensors have a clear view of the arc during the actual weld position.
Sensors can be blocked by a hand, glove, fixture, pipe, corner joint, bench edge, or the workpiece itself. That is why a helmet may work well on flat practice beads but act unreliable in a tight position. If the sensors cannot see the arc, reposition the work or your body before welding.
The Electronic Filter Lens
The auto-darkening filter is the lens assembly that changes state. In simple terms, it uses an electronic filter layer controlled by the helmet circuitry. Sensor input changes the filter to the selected shade. When the arc stops, the delay setting controls how quickly it returns lighter.
Quality matters here. A clear viewing area, reliable response, correct shade range, and good lens condition make the helmet easier to use. A scratched cover lens or dirty viewing area can make the weld pool hard to read even if the electronics are working.
Power: Batteries and Solar Assist
Many auto-darkening helmets use replaceable batteries, solar assist, or both. The power system supports the electronics that control the filter. A weak battery can cause unreliable behavior, depending on the helmet design. Beginners should check battery condition before assuming a welding problem is caused by machine settings.
Some helmets have a test button or low-battery indicator. Use it. If the helmet has been stored for a long time, test it before welding. A helmet that worked last month is not guaranteed to work today without inspection.
Shade, Sensitivity, and Delay
Shade controls how dark the filter becomes. Sensitivity controls how easily the helmet reacts to arc light. Delay controls how long the lens stays dark after the arc stops. These three settings make the helmet adaptable, but they also give beginners more ways to set it wrong.
For bright stick welding, one sensitivity behavior may feel fine. For lower-amp TIG, the helmet may need different sensitivity to stay stable. If other welders nearby are triggering your helmet, sensitivity may need adjustment. Always use the manual as the starting point.
Low-Amp TIG and Sensor Problems
Low-amperage TIG can be more demanding for some auto-darkening helmets because the arc signal may be smaller than a bright stick or MIG arc. This does not mean all auto-darkening helmets are bad for TIG. It means beginners should check whether the helmet is suitable for the amperage and process they plan to use.
If a helmet flickers during low-amp work, stop and check sensitivity, sensor view, lens condition, and battery. Do not continue welding through flicker or delayed darkening. The problem needs to be solved before practice continues.
Sensitivity and Delay Controls
Many auto-darkening helmets have sensitivity and delay controls. Sensitivity affects how easily the helmet reacts to arc light. Delay controls how quickly the lens returns to the lighter state after the arc stops. These settings help the helmet behave better in different work situations.
For low-amp TIG, a helmet may need different sensitivity than for bright stick welding. In a busy shop with nearby arcs, settings may need adjustment so the helmet does not respond at the wrong time. Beginners should change settings slowly and read the manual before guessing.
Cover Lenses and Visibility
Cover lenses protect the filter lens from scratches, spatter, dust, and grinding debris. They are meant to be replaced. A cloudy or pitted cover lens makes the weld harder to see, and poor visibility can make a beginner chase the arc instead of watching the puddle.
Clean visibility is part of safety. If you cannot see the joint clearly before welding, fix the lighting, lens, position, or work setup first. Do not compensate by leaning too close to the arc or lifting the helmet.
Headgear and Fit
Headgear controls how the helmet sits on your head. It affects comfort, viewing angle, balance, and whether the helmet stays down while you weld. Poor fit can make a beginner lift the helmet too often or move awkwardly during a bead.
Adjust the headband, top strap, tilt, and tension before welding. Lower the helmet and look at the joint with the welder off. If you cannot see the start point without bending into a bad position, adjust the work or helmet before striking the arc.
Why Safety Glasses Are Still Needed
A welding helmet does not replace safety glasses. The helmet protects the face and provides the welding filter shade, but grinding, chipping, brushing, fitting, and cleanup can send particles toward your eyes when the helmet is raised. Safety glasses provide impact protection during those tasks.
Clear safety glasses do not protect enough from the welding arc, but they are still important under the helmet. Read Do Clear Safety Glasses Protect From Welding Flash? for a deeper explanation.
Grind Mode and Helmet Modes
Many auto-darkening helmets include grind mode. Grind mode keeps the lens from darkening while you grind, so you can see the work clearly. It is useful for prep, but it is not a welding mode. The helmet must be switched back before striking an arc.
This is a common beginner mistake because grinding and welding often happen back to back. For a step-by-step safety check, read What Is Grind Mode on a Welding Helmet?.
How a Helmet Protects Bystanders
A helmet protects the person wearing it. It does not protect everyone else in the room. Bystanders can still see the arc unless you use welding screens, curtains, shields, or a controlled work area. This matters in garages, schools, shared shops, and job sites.
Before welding, warn nearby people and block the arc from view. Children and pets should be kept away from welding areas. Reflected arc light can also be a problem, so think about shiny metal, walls, and open doorways.
What a Welding Helmet Does Not Do
A welding helmet does not remove fumes, stop electric shock, make hot metal safe to touch, or protect the rest of your body from burns. It is important PPE, but it is not the whole safety system. Ventilation, gloves, clothing, boots, fire safety, and safe work habits still matter.
The helmet also does not fix poor visibility caused by dirty metal, bad lighting, smoke, or awkward joint position. A beginner should improve the workspace instead of treating the helmet as the only variable.
Beginner Troubleshooting
If the helmet is hard to see through, check the cover lens first. Then check lighting, shade setting, fogged glasses, and your viewing angle. If an auto-darkening helmet flickers or fails to darken, stop welding and check batteries, sensors, mode, sensitivity, and the manual.
If the helmet slips, tighten or adjust the headgear before welding again. If the shell is cracked or the lens system is damaged, replace parts or use another verified helmet. Do not keep practicing with unreliable safety gear.
A Simple Helmet Workflow
Use the same workflow every time. Put on safety glasses first. Inspect the shell and lens. Check the shade or auto-darkening settings. Confirm grind mode is off before welding. Lower the helmet and look at the joint with the welder off. Then weld only when the view, fit, and work area are ready.
After the bead, keep safety glasses on for brushing, chipping, grinding, and cleanup. If you switch back to grinding, use grind mode only for that task, then return to weld mode before the next arc. A predictable workflow prevents most beginner helmet mistakes.
Basic Helmet Maintenance
Store the helmet away from moisture, grinding dust, sharp scrap, and heavy tools. Replace cover lenses before they become too scratched to see through. Check batteries and controls on auto-darkening helmets. Good maintenance keeps the helmet easier to trust and easier to use. It also makes daily safety checks faster and practice sessions less frustrating. Clean, reliable gear helps beginners focus on the weld instead of fighting the view.
Passive vs Auto-Darkening: Which Works Better?
Neither style is automatically better for every welder. Passive helmets are simple and can be dependable. Auto-darkening helmets can make starts and tack welds easier, especially for beginners. The safer choice is the helmet that is rated, maintained, set correctly, and used consistently.
For many beginners, auto-darkening helps because the helmet can stay down while lining up the joint. For rough work, tight budgets, or simple shop use, a passive helmet can still work well. Fit, lens quality, shade suitability, and reliability matter more than hype.
Beginner Helmet Check Before Welding
- Inspect the shell for cracks or heat damage.
- Clean or replace dirty cover lenses.
- Confirm the correct shade for the process.
- Check auto-darkening sensors and battery if used.
- Make sure grind mode is off before welding.
- Adjust the headgear so the helmet stays in place.
- Wear safety glasses under the helmet.
- Use screens to protect bystanders.
Safety Warning
Welding can expose you to ultraviolet radiation, infrared radiation, bright visible light, sparks, hot metal, fumes, fire hazards, and electric shock. Use the helmet manual, machine manual, and recognized safety guidance before welding. Helpful references include OSHA welding, cutting, and brazing guidance, AWS safety and health fact sheets, and NIOSH welding resources.
FAQ
Does a welding helmet block UV light?
A proper welding helmet with the correct filter helps protect against welding arc radiation when used correctly. Damaged, incorrect, or misused helmets should not be trusted.
How does an auto-darkening welding helmet know when to darken?
It uses sensors to detect the welding arc and trigger the electronic filter to switch to the selected dark shade.
Can a welding helmet work without safety glasses?
The helmet may provide arc and face protection, but safety glasses are still recommended for grinding, chipping, brushing, and cleanup impact hazards.
Why is my welding helmet hard to see through?
Common causes include dirty cover lenses, poor lighting, wrong shade, fogged safety glasses, scratched lenses, or awkward body position.
Final Advice
A welding helmet works by reducing arc light and covering the face, but it only protects well when the shade, lens, shell, sensors, and fit are right. Inspect it before welding, wear safety glasses underneath, protect bystanders, and make helmet checks part of your beginner routine. For more, start with Welding Safety.