Are Auto-Darkening Welding Helmets Safe?
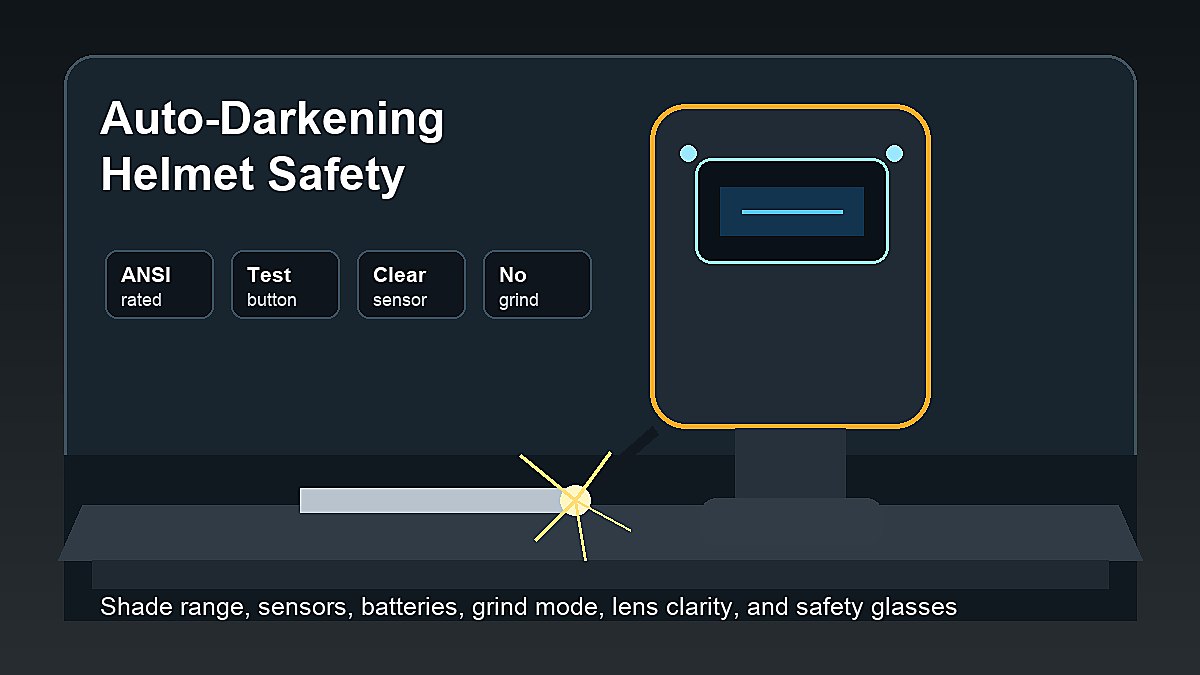
Are auto-darkening welding helmets safe? Yes, a quality auto-darkening welding helmet can be safe when it is rated for welding, set correctly, inspected before use, and worn with the rest of your PPE. The unsafe part is usually not the idea of auto-darkening. The risk comes from poor settings, blocked sensors, weak batteries, damaged lenses, grind mode mistakes, or using a cheap helmet that does not meet proper eye and face protection standards.
Beginners like auto-darkening helmets because they make it easier to see the joint before the arc starts. That can improve torch placement, tack welds, and comfort. But convenience does not remove the need for safety glasses, correct shade range, lens inspection, and good welding habits.
Mark Dawson beginner note: treat an auto-darkening helmet like safety equipment, not a gadget. Flicker, late darkening, damaged cover lenses, or grind mode mistakes are stop signs. Fix the problem before striking another arc.
Quick Answer
Auto-darkening welding helmets are safe for beginner welding when they are properly rated, in good condition, set to the correct shade, tested before use, and used with safety glasses and other welding PPE. They are not safe if the lens fails to darken, the sensors are blocked, the battery is weak, the helmet is in grind mode, or the shade setting is wrong for the process.
| Safety Check | What to Look For | Why It Matters |
|---|---|---|
| Rating | Welding-rated helmet and lens | Not all dark lenses are suitable for welding. |
| Shade | Correct range for process and amperage | Wrong shade can hurt visibility or protection. |
| Sensors | Clean and not blocked | Blocked sensors may delay darkening. |
| Battery | Good charge or working solar assist | Weak power can cause unreliable response. |
| Mode | Not left in grind mode | Grind mode may prevent welding shade activation. |
How Auto-Darkening Welding Helmets Work
An auto-darkening welding helmet uses a filter lens that stays lighter before welding and darkens when sensors detect the arc. This lets you position the torch, electrode, or filler rod while the helmet is already down. Once the arc starts, the lens switches to a darker welding shade.
The lens, sensors, controls, batteries, cover plates, and helmet shell all matter. A good helmet is a system. If one part is dirty, damaged, set wrong, or blocked by your hand or workpiece, the helmet may not perform the way you expect.
Why Beginners Like Auto-Darkening Helmets
Beginners often struggle to lower a passive helmet without losing the start point. Auto-darkening helmets solve that problem by letting you line up the joint with the helmet down. This can make tacking, MIG starts, stick starts, and TIG filler placement easier to learn.
Better visibility before the arc can also reduce bad body position. Instead of nodding the helmet down and guessing where the joint went, you can settle into a stable stance first. That is helpful for the basics covered in How to Use a Welding Helmet Safely.
Who Should Use an Auto-Darkening Helmet?
Auto-darkening helmets are especially helpful for beginners who are learning starts, tack welds, and body position. They are also useful for welders who switch between short beads, fit-up, and inspection throughout a project. The lighter state makes it easier to keep the helmet down while lining up the joint.
That does not mean every beginner must buy one first. A passive helmet can still be safe and reliable. The better choice is the helmet you can verify, fit correctly, see through clearly, and use every time. Keeping protection down before the arc starts is a real beginner advantage.
When Auto-Darkening Helmets Can Be Unsafe
Auto-darkening helmets become risky when welders trust them without checking them. A helmet may fail to darken correctly if the battery is weak, sensors are covered, the lens is damaged, the controls are set wrong, or the helmet is left in grind mode. Cheap unknown helmets can also create concern if you cannot verify the rating and instructions.
Welding in corners, around tubing, inside tight joints, or near fixtures can block sensors from seeing the arc. If sensor view is blocked, reposition the work or your body. Do not keep welding just because the helmet worked in a different position earlier.
Some problems show up as eye discomfort, sudden brightness, flickering, or a lens that seems to change at the wrong time. Do not try to tough it out. Stop, lift away from the work, and troubleshoot the helmet before continuing. Beginner welding practice is not worth risking your eyes.
Check the Helmet Rating and Standard
Use a welding helmet that is made for welding, not ordinary tinted eye protection. In the United States, eye and face protection is commonly associated with ANSI Z87.1 markings and employer or workplace rules. Beginners should read the helmet manual and product markings instead of relying only on online photos or price.
A rating does not mean you can ignore setup. It means the helmet is designed for a protection category when used correctly. Damaged, modified, or misused safety gear can still be unsafe.
Set the Correct Shade Range
Auto-darkening helmets often have adjustable shade settings. The correct shade depends on the process, amperage, and manufacturer guidance. MIG, TIG, stick, flux core, plasma cutting, and grinding do not all use the same setting.
A shade that is too light may expose your eyes to excessive brightness. A shade that is too dark may make the joint hard to see, which can hurt technique and cause poor positioning. Use the manual, machine guidance, and recognized safety guidance rather than guessing.
Process-Specific Helmet Notes
MIG welding, TIG welding, stick welding, flux core welding, grinding, and cutting can place different demands on a helmet. TIG may require good low-amp sensor response. Stick and flux core can create more spatter and smoke around the lens. Grinding needs impact protection and often a separate face shield setup depending on the work.
Beginners moving between types of welding should recheck helmet mode and shade every time the process changes. A setting that felt right during MIG welding practice may not be the right setting for stick welding, TIG welding, or plasma cutting.
Test the Auto-Darkening Function
Many helmets include a test button. Some also rely on sunlight, a bright test source, or a controlled arc test described in the manual. Before welding, confirm that the lens darkens, the controls respond, and the helmet is not flickering.
Do not use a helmet that reacts late, stays light, randomly flashes, or gives an inconsistent view. Stop and check the battery, sensors, lens, settings, and manual. If the problem continues, replace the helmet or get qualified help.
Watch Out for Grind Mode
Grind mode is useful because it keeps the lens from darkening while grinding. It is also one of the easiest beginner mistakes. A helmet left in grind mode during welding may not switch to a welding shade when the arc starts.
Make a habit of checking the mode before every weld. Some helmets have an indicator light or switch position. Others are less obvious. A simple mode check can prevent a painful surprise.
Keep Sensors and Cover Lenses Clean
Spatter, dust, smoke, stickers, gloves, fixture shadows, and scratched cover plates can interfere with visibility or sensor response. Wipe the outside lens and sensors before practice. Replace cover lenses that are pitted, cloudy, cracked, or hard to see through.
Clean lenses also improve welding quality. If you cannot see the weld pool, joint edges, or start point, you may move too fast, hold the wrong angle, or create uneven beads. Safety and technique are tied together.
Wear Safety Glasses Under the Helmet
An auto-darkening helmet protects against arc exposure and face hazards, but safety glasses still matter. Grinding, brushing, chipping, and cleanup can send particles toward your eyes when the helmet is lifted. Keep safety glasses on as part of the complete PPE setup.
For a full PPE checklist, read Protective Equipment Essentials for Beginner Welders. Helmet safety works best when gloves, clothing, footwear, ventilation, and fire safety are handled too.
Buying Safety Checks for Beginners
When buying an auto-darkening helmet, look beyond graphics and price. Check the shade range, viewing area, sensor count and placement, battery access, grind mode indicator, headgear comfort, replacement cover lens availability, and the manual. A helmet that is hard to adjust or hard to maintain is a poor learning tool.
Fit matters too. A helmet that slides, presses painfully, or leaves your neck exposed will tempt you to lift it more often. That is why helmet choice belongs in your broader beginner welding setup, not as a random last-minute accessory.
For home shops, also think about replacement parts. Cover lenses get scratched. Batteries die. Headgear wears out. A helmet with easy-to-find parts may stay safer longer than a cheaper helmet that becomes disposable after the first problem.
First-Use Routine
Before the first weld of the day, put on safety glasses, lower the helmet, check the mode, press the test button when available, and look through the lens at the joint. Then do a dry run with the welder off. This short routine catches most beginner helmet mistakes before bright arc light is involved. It also helps you notice poor lighting, blocked sensors, dirty cover lenses, weak batteries, or uncomfortable headgear before practice becomes distracting. Small checks prevent rushed fixes later.
Auto-Darkening vs Passive Helmets
A passive helmet uses a fixed dark lens. It is simple and does not rely on electronics, but beginners must learn to lower it without losing the start point. An auto-darkening helmet is easier for setup and tacking, but it needs power, sensors, controls, and inspection.
Both styles can be safe when used correctly. The better choice depends on fit, rating, visibility, reliability, budget, and the kind of welding you practice. Do not choose based only on convenience or appearance.
Beginner Safety Checklist
- Confirm the helmet is welding-rated and in good condition.
- Check the shade setting for the process and amperage.
- Make sure the helmet is not in grind mode.
- Test the auto-darkening function before welding.
- Inspect batteries, sensors, and cover lenses.
- Put on safety glasses under the helmet.
- Keep sensors clear of hands, fixtures, and shadows.
- Stop welding if the lens flickers or fails to darken.
- Use gloves, FR clothing, boots, ventilation, and fire safety gear.
Safety Warning
Welding can expose you to ultraviolet radiation, infrared radiation, bright visible light, hot metal, sparks, fumes, fire hazards, and electric shock. Follow your helmet manual, welding machine manual, workplace rules where applicable, and recognized safety guidance. Useful references include OSHA welding, cutting, and brazing guidance, AWS safety and health fact sheets, and NIOSH welding resources.
FAQ
Are cheap auto-darkening welding helmets safe?
They may be safe only if they are properly rated, undamaged, and used correctly. Avoid helmets with unclear markings, poor instructions, unreliable darkening, weak headgear, or no trustworthy safety information.
Can auto-darkening helmets fail?
Yes. Problems can come from weak batteries, damaged lenses, blocked sensors, wrong settings, grind mode, or poor-quality equipment. Test the helmet and stop welding if it acts unreliable.
Do auto-darkening helmets protect before they darken?
Quality welding helmets are designed with filtering protection, but you should still use the correct shade settings and follow the manual. Do not stare at arcs, test helmets carelessly, or use damaged gear.
Do I need safety glasses with an auto-darkening helmet?
Yes. Safety glasses help protect your eyes from particles during grinding, brushing, chipping, and cleanup. They are not a replacement for the welding helmet.
Why does my auto-darkening helmet flicker?
Flicker may come from weak batteries, blocked sensors, low sensitivity, poor arc detection, damaged lenses, or a helmet problem. Stop welding and troubleshoot before continuing.
Final Advice
Auto-darkening welding helmets are safe when the helmet is rated, maintained, tested, and set correctly. For beginners, the best habit is simple: inspect the helmet, check shade and mode, keep sensors clear, use full PPE, and stop immediately if the lens does not behave correctly. That routine makes the convenience of auto-darkening useful without turning it into a shortcut.