How to Set Up a TIG Welder for Aluminum
If you want to learn how to set up a TIG welder for aluminum, the main starting points are AC mode, pure argon shielding gas, clean aluminum, the right tungsten, and a test piece before the real weld. Aluminum TIG is sensitive to oxide, heat, and gas coverage, so setup matters before technique even starts.
Aluminum does not behave like mild steel. It conducts heat quickly, forms a tough oxide layer, and can go from cold to melted faster than beginners expect. A good setup gives you a cleaner arc, better puddle control, and fewer ugly starts.
Mark Dawson beginner note: do not use your first aluminum practice piece as the final project. Set the machine on scrap from the same material first, because aluminum thickness and cleanliness change the setup fast.
Quick Answer
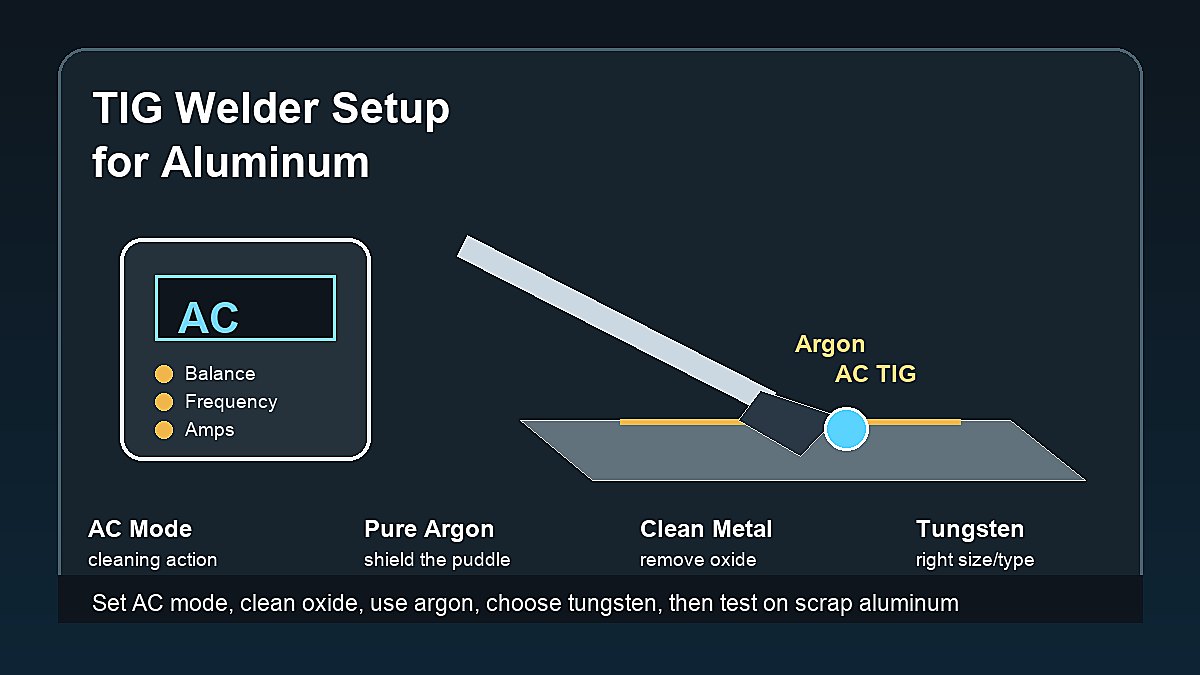
To set up a TIG welder for aluminum, switch the machine to AC TIG, use 100% argon shielding gas, clean the aluminum oxide layer, choose a suitable tungsten such as lanthanated tungsten, set amperage for the metal thickness, use enough gas flow for the cup size, and test AC balance and frequency on scrap. Keep the tungsten clean and use filler rod that matches the aluminum alloy when possible.
| Setup Item | Beginner Starting Point | Why It Matters |
|---|---|---|
| Current type | AC TIG | Helps break oxide and weld aluminum |
| Shielding gas | 100% argon | Protects tungsten and puddle |
| Cleaning | Degrease and brush oxide | Reduces contamination |
| Tungsten | Lanthanated, suitable size | Stable arc and current capacity |
| Practice | Test on matching scrap | Confirms heat and settings |
What You Need Before Setup
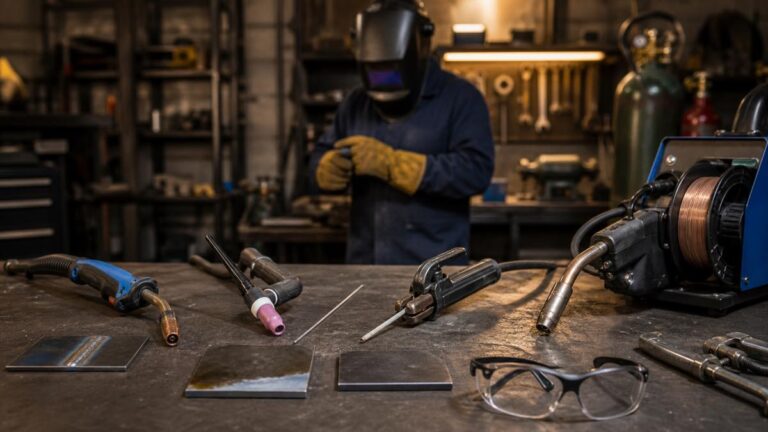
Before setting the machine, gather the right basics: an AC-capable TIG welder, TIG torch, pure argon cylinder and regulator, clean filler rod, tungsten electrodes, a ceramic cup or gas lens setup, stainless brush dedicated to aluminum, acetone or approved cleaner, clamps, and PPE.
Not every TIG machine can weld aluminum well. Aluminum TIG usually requires AC output. A DC-only TIG machine is useful for steel and stainless, but it is not the normal choice for beginner aluminum TIG. Check the manual before assuming your machine can do it.
If you are still learning TIG basics, read TIG Welding for Beginners and Basic TIG Welding Techniques for Beginners before starting aluminum practice.
Step 1: Set the Machine to AC TIG
Aluminum is normally TIG welded on AC because AC helps handle the oxide layer while still putting heat into the base metal. The oxide layer melts at a much higher temperature than the aluminum underneath, which is one reason aluminum can feel confusing at first.
Choose AC TIG mode, then confirm the torch, work clamp, remote control, and gas connection match your machine manual. If your machine has high frequency start, use the manufacturer setting for AC TIG. If it has lift start, follow the manual carefully to avoid contamination.
Do not copy a random setting chart without checking your machine. Different inverters label AC balance and frequency differently, and older transformer machines may have fewer controls.
Step 2: Use 100% Argon Shielding Gas
Pure argon is the usual beginner shielding gas for TIG welding aluminum. It helps protect the tungsten and molten aluminum from the air. Do not use CO2 or MIG steel gas mixes for TIG aluminum.
Set gas flow based on cup size, torch setup, and workspace conditions. Too little gas can leave the weld dull, dirty, or oxidized. Too much gas can create turbulence that pulls air into the shielding zone. Indoors, a moderate flow is usually a better start than simply turning the regulator high.
Check for leaks, loose fittings, cracked cups, blocked gas lenses, and drafts. For gas basics, see What Gas Do You Use for TIG Welding?.
Step 3: Clean the Aluminum Properly
Cleaning is not optional with aluminum. Remove oil, marker, grease, adhesive, and shop dirt first. Then remove oxide with a stainless steel brush used only for aluminum. Brushing with a dirty steel brush can add contamination instead of fixing it.
Clean the filler rod too. Wipe it before welding and keep it off dirty benches. Aluminum filler can carry grime into the puddle if it has been handled, dropped, or stored loosely in the shop.
Weld soon after cleaning. Aluminum begins forming oxide again once exposed to air. For beginner practice, clean small batches of coupons instead of preparing a huge pile and letting it sit.
Step 4: Choose Tungsten Type and Size
Many modern inverter TIG setups use lanthanated tungsten for aluminum. The size should match amperage and material thickness. A tungsten that is too small can overheat, split, or ball excessively. A tungsten that is too large may feel sluggish at lower amperage.
For more detail, read Different Types of Tungsten for TIG Welding and How to Choose the Right Tungsten Electrode Size.
Tip shape depends on the machine. Some older setups used a balled pure tungsten. Many newer inverter machines work well with a tapered or slightly truncated tungsten. Follow your machine manual and test on scrap. For prep details, use How to Grind Tungsten for TIG Welding.
Step 5: Set Amperage for Aluminum Thickness
Aluminum needs enough heat to start the puddle, but too much heat can quickly make the part collapse or sag. A foot pedal or fingertip control helps because you can add heat to start, then back off as the material warms up.
Use the machine chart or manual as a starting point. Then test on scrap with the same thickness, joint, and fit-up. If the puddle will not start, you may need more amperage, cleaner metal, better arc length, or slower travel. If the edge melts away immediately, reduce heat, move faster, or improve joint fit-up.
Do not rely only on a single amp number. Torch angle, filler rod size, joint type, aluminum alloy, and part size all change how the heat feels.
Choose the Right Aluminum Filler Rod
Filler rod choice depends on the aluminum alloy and the job. Beginners often see 4043 and 5356 filler rods because they are common, but they are not interchangeable for every project. The filler should match the base metal, strength needs, corrosion exposure, and any finishing requirements.
If you do not know the aluminum alloy, treat the project as practice or get qualified guidance before making anything critical. Unknown aluminum can crack, weld poorly, or behave differently from the scrap you used for testing.
Rod size should fit the puddle. Too large a filler rod can chill the puddle and make the bead lumpy. Too small a rod may disappear too quickly and tempt you to feed too fast. Keep the hot end of the filler inside the shielding gas between dips.
Step 6: Adjust AC Balance and Frequency
AC balance changes how much of the cycle is used for cleaning action versus penetration. More cleaning can help with oxide, but too much can overheat the tungsten and widen the etched area. More penetration can make the arc feel focused, but dirty aluminum may not clean well enough.
AC frequency changes arc focus on machines that provide the control. Higher frequency can tighten the arc and help on corners or precise work. Lower frequency can feel softer and wider. Beginners should start near the machine default, then adjust one control at a time.
Make only small changes during practice. If you change amperage, balance, frequency, gas flow, filler, and travel speed all at once, you will not know which change helped.
Use a Scrap Test Before the Real Weld
A scrap test should match the real job as closely as possible. Use the same thickness, same joint style, similar fit-up, and the same filler rod. A setting that works on a flat bead-on-plate coupon may not work on an outside corner, lap joint, or tight fillet.
Run a short bead, let it cool, and inspect it. Look for a clean puddle, steady bead width, proper wetting at the edges, and a controlled heat-affected area. If the bead looks sooty, dull, or peppered, check cleaning and shielding before increasing amperage.
Write the setup down when it works. Aluminum practice gets much easier when you build your own notes for cup size, gas flow, tungsten, balance, frequency, material thickness, and filler rod.
Step 7: Set Cup, Stickout, and Torch Position
Cup size and tungsten stickout affect shielding. Keep the cup close enough for gas coverage, and avoid extreme stickout unless your gas lens and gas flow support it. Aluminum stays hot and reactive, so poor shielding can show up as dull, dirty, or peppered welds.
Hold a short, steady arc and use a slight torch angle. Keep the filler rod inside the gas shield between dips. If torch control feels shaky, revisit How to Hold a TIG Welding Torch.
Control Heat Buildup
Aluminum spreads heat quickly, then suddenly becomes too hot once the part warms up. This is why a bead may start slowly and then begin melting too fast near the end. A foot pedal helps because you can reduce amperage as heat builds.
For thin aluminum, short practice beads are smarter than long heroic beads. Stop before the part overheats, let it cool, and compare the start of the bead with the end. If the end is much wider, heat buildup is controlling the weld more than your hand is.
Fit-up also matters. Large gaps make aluminum harder to control because the edges can melt away before the joint fills. Clamp parts securely and practice tacks before trying a full bead.
Beginner Setup Checklist
- Confirm the machine supports AC TIG.
- Connect pure argon and check gas flow.
- Clean aluminum and filler rod.
- Install the correct tungsten type and size.
- Set AC mode, amperage, balance, and frequency near the manual starting point.
- Set cup size, tungsten stickout, and torch angle.
- Test on matching scrap before welding the project.
- Change one setting at a time and write down what improves.
Common Aluminum TIG Setup Mistakes
- Trying to weld aluminum with a DC-only TIG setup.
- Using the wrong shielding gas.
- Skipping oxide removal and blaming the machine.
- Using contaminated filler rod.
- Running too much gas and causing turbulence.
- Using too much tungsten stickout without gas coverage.
- Changing every setting at the same time.
- Practicing on scrap that is not the same thickness as the project.
Troubleshooting First Aluminum Beads
If the arc wanders, check tungsten condition, arc length, and gas coverage. If the weld looks dirty, clean the aluminum again and verify the filler rod is clean. If the tungsten balls heavily or splits, check tungsten size, AC balance, and amperage.
If the puddle takes too long to form, the aluminum may be too thick for the amperage, the part may be pulling heat away, or the oxide layer may still be heavy. If the part suddenly collapses, heat has built up and you may need to back off the pedal, move faster, or let the part cool.
Aluminum TIG improves faster when you keep notes. Record metal thickness, tungsten size, cup size, gas flow, amperage range, balance, frequency, filler rod, and what the bead looked like.
If one change makes the weld worse, go back to the last known workable setup. Beginners often keep turning knobs until the machine is far from a sensible baseline. A clean reset saves time and makes the next test easier to understand.
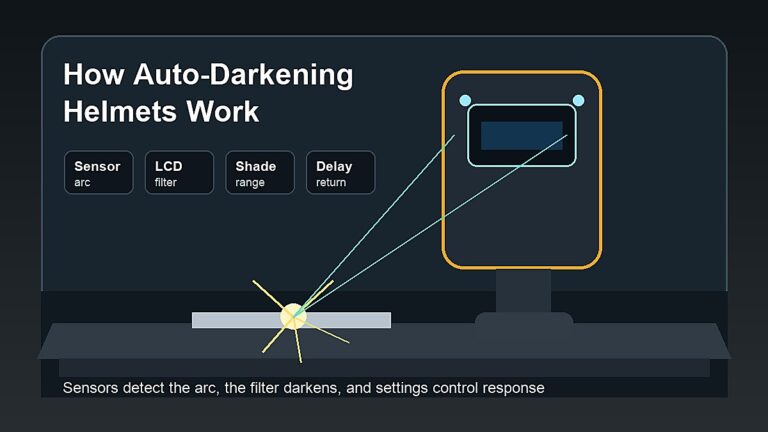
Use the same helmet shade, lighting, and table position during tests so your view of the puddle stays consistent.
Safety Notes
TIG welding aluminum can expose you to UV radiation, hot metal, electric shock, fumes, gas cylinder hazards, fire risk, and burns. Use a proper welding helmet, gloves, flame-resistant clothing, eye protection for cleaning and grinding, and suitable ventilation. Keep flammable material away from the work area.
Do not weld unknown aluminum parts, coated material, containers, pressure parts, vehicle parts, or structural parts without proper training and inspection. Review OSHA welding hazards guidance, OSHA welding, cutting, and brazing requirements, and AWS safety resources.
FAQ
Do you use AC or DC TIG for aluminum?
Aluminum is normally TIG welded on AC because AC helps deal with the oxide layer while welding. Check your machine manual for the correct AC TIG setup.
What gas do you use for TIG welding aluminum?
Pure argon is the common beginner shielding gas for TIG welding aluminum. Do not use CO2 or typical MIG steel gas mixes for TIG aluminum.
Do you need to clean aluminum before TIG welding?
Yes. Remove grease and dirt first, then remove oxide with a stainless brush dedicated to aluminum. Dirty aluminum is one of the fastest ways to ruin beginner TIG welds.
What tungsten is best for aluminum TIG?
Many modern inverter machines work well with lanthanated tungsten for aluminum. The best choice depends on the machine, amperage, and material thickness.
Why does my aluminum TIG weld look dirty?
Common causes include poor cleaning, contaminated filler rod, weak gas coverage, too much torch angle, incorrect AC balance, drafts, or contaminated tungsten.
Final Advice
Aluminum TIG setup is a system: AC mode, argon gas, clean metal, correct tungsten, steady torch control, and careful heat control. Start with the machine manual, test on matching scrap, and adjust one variable at a time until the puddle becomes predictable.